If you are looking to make your web application available to the public, then this article is for you. Today, Aneeqa will guide you through the detailed steps for deploying your ReactJS App created using UXPin Merge.
UXPin Merge is an invaluable tool for crafting stunning web applications effortlessly, sans any coding. By leveraging its array of built-in components, you can generate functional code, eliminating the necessity for a dedicated designer within your team.
While this plugin is predominantly accessible through paid plans tailored to various requirements, it’s also available for a 14-day trial period, allowing users to explore its capabilities firsthand. Try it for free.
Design UI with code-backed components.
Use the same components in design as in development. Keep UI consistency at scale.
React app deployment is the process of making your React web application available online for users to access.
To deploy your app, first, ensure that your code is optimized and ready for production. Then, choose a hosting service like GitHub Pages, Heroku, Netlify, or AWS Amplify where you’ll upload your app files.
GitHub Pages allows you to host static websites directly from your GitHub repositories. Heroku provides a platform-as-a-service (PaaS) that enables developers to deploy, manage, and scale web applications effortlessly. Netlify offers a hosting platform with features like continuous deployment, and built-in CDN. AWS Amplify is a cloud platform that offers a comprehensive set of tools and services for building and deploying full-stack serverless and cloud-based web applications.
After deployment, thoroughly test your app across different devices and browsers to ensure it functions correctly. Monitor its performance, and optimize resources as needed.
Finally, streamline future updates by implementing version control and automation techniques.
By following these steps, you can effectively deploy and maintain your React app for users to enjoy.
Step 1: Create a React app
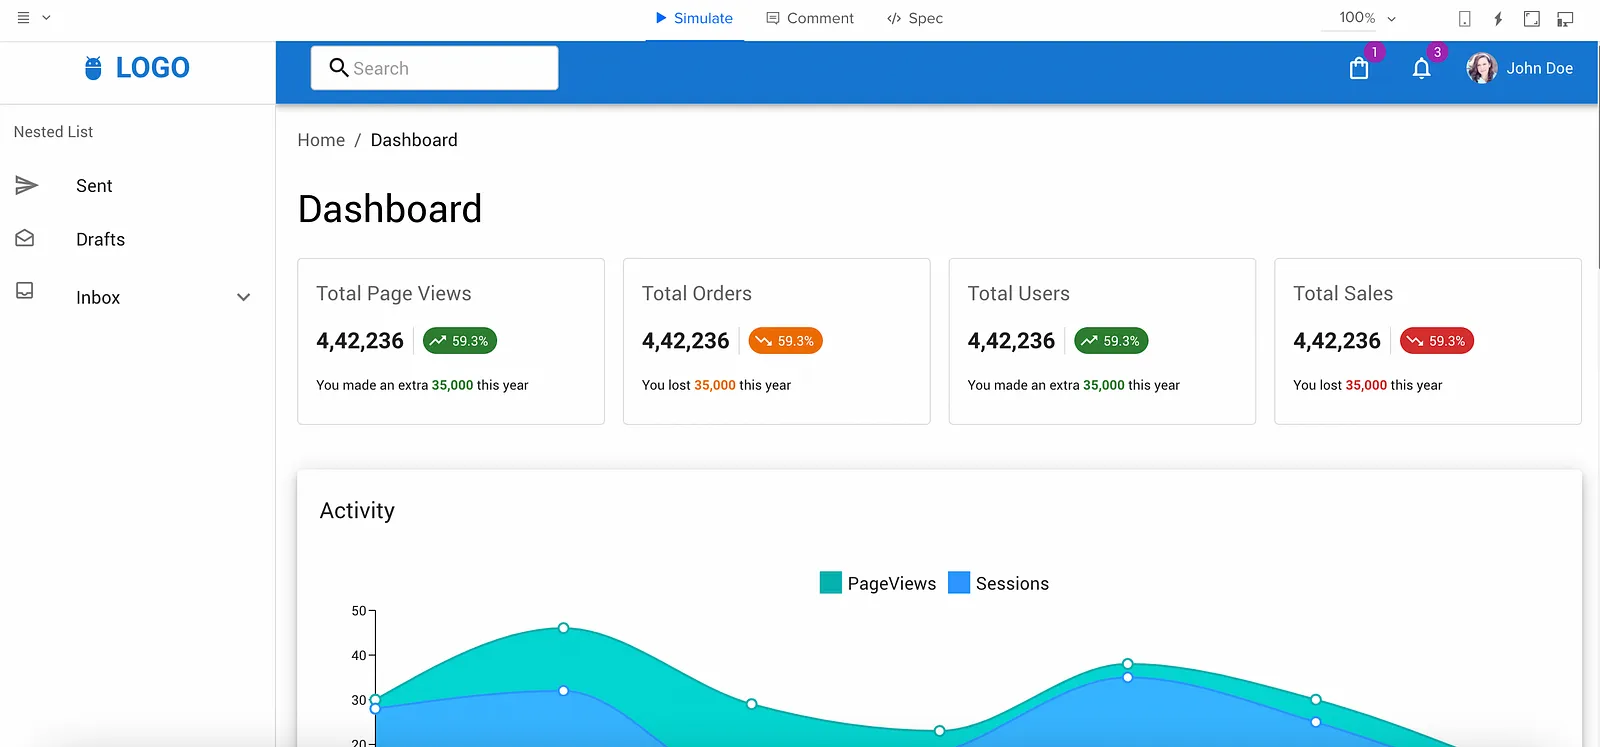
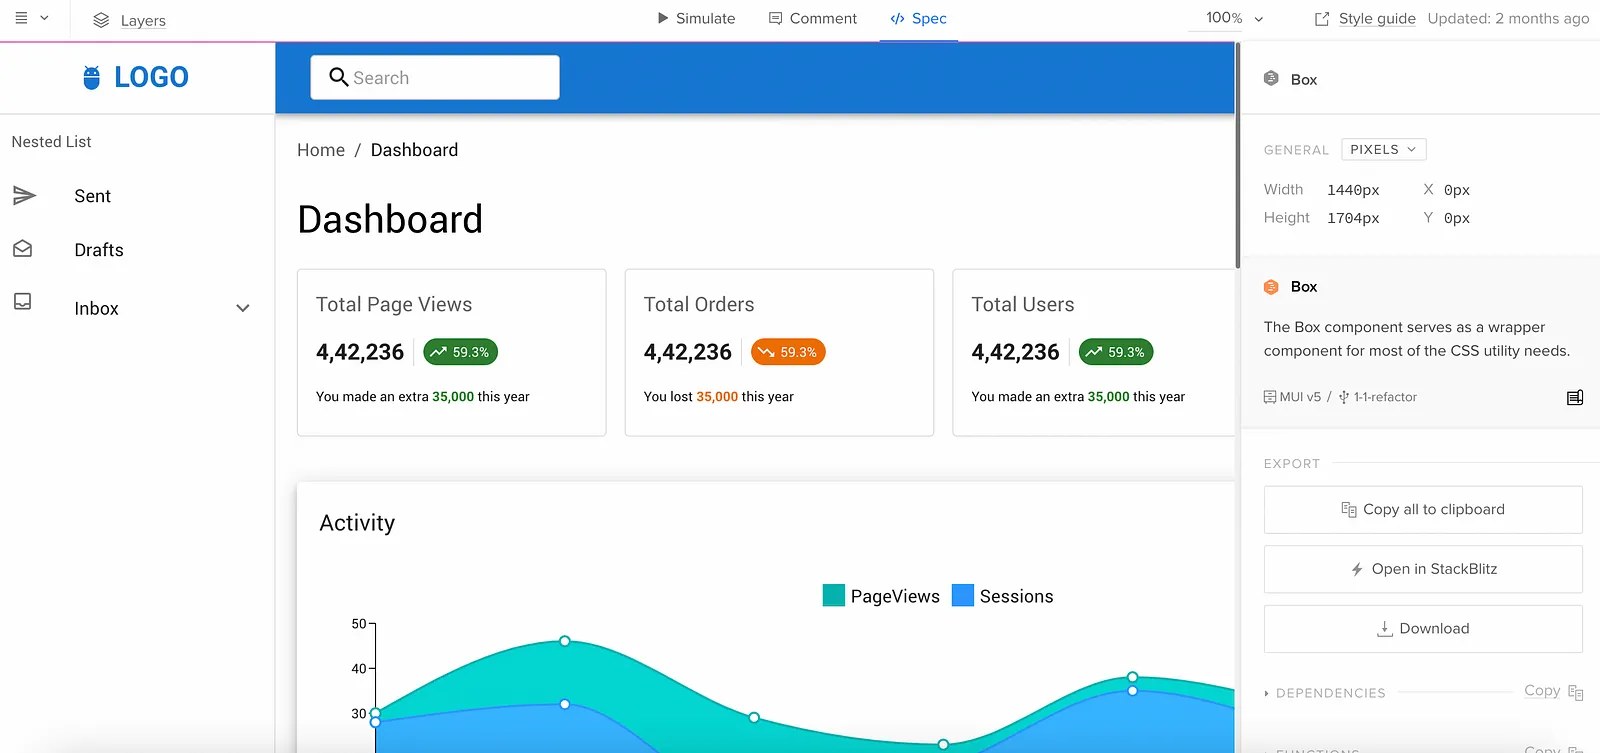
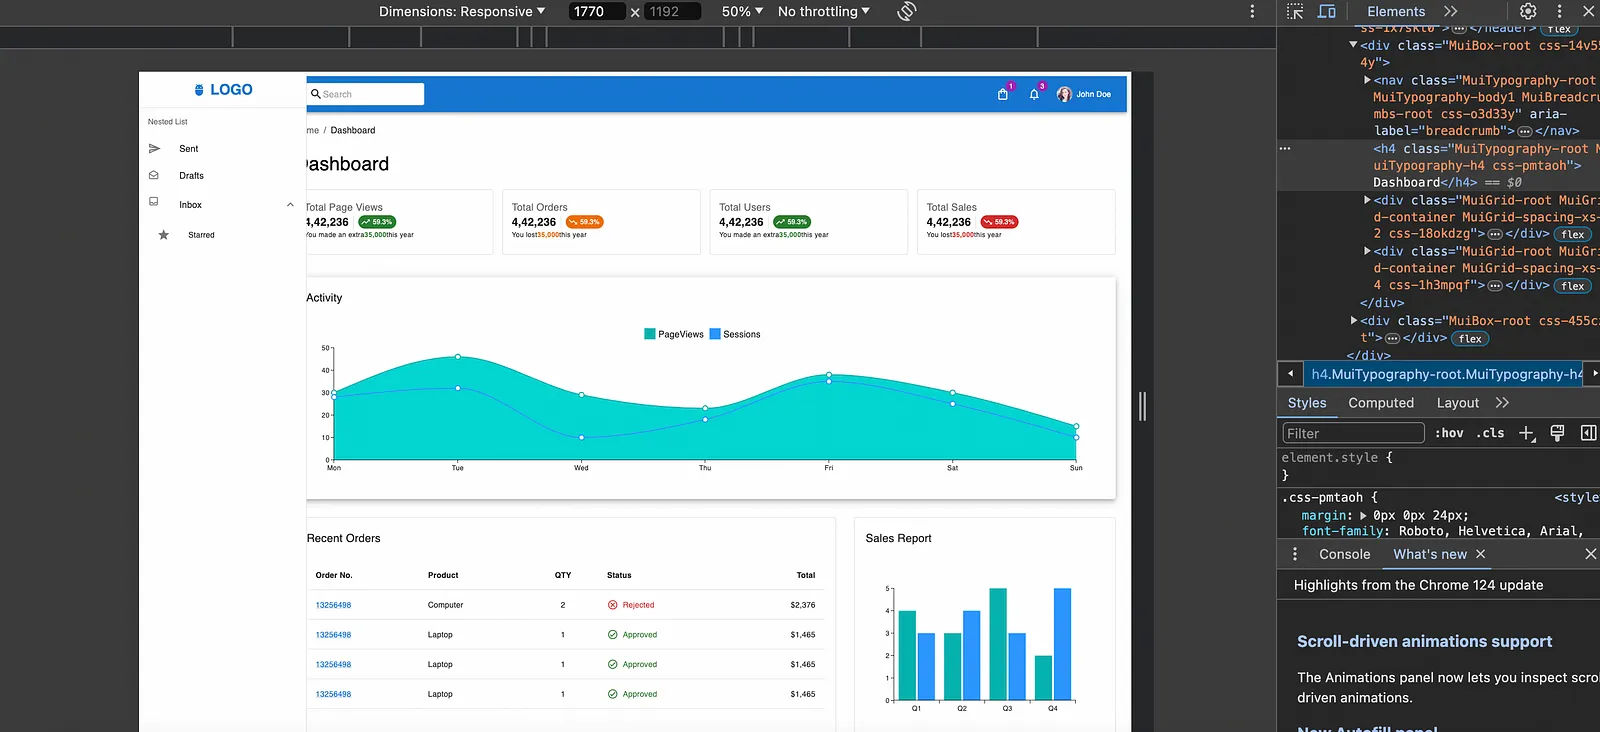
Firstly, let’s create a dashboard application to monitor analytics, order history, and sales.
Go to the UXPin Merge website and start the trial.
It’ll take you to the register account page. Enter your details and create your free account.
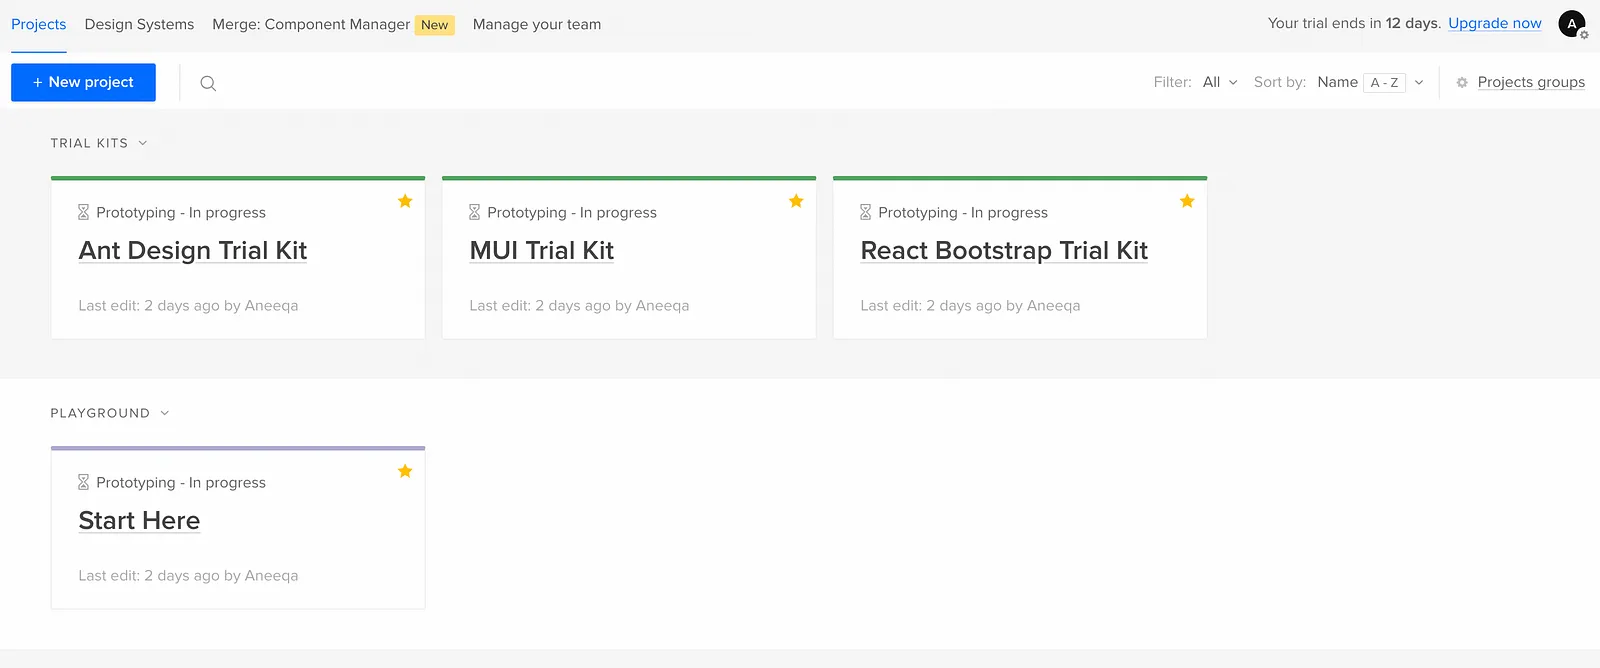
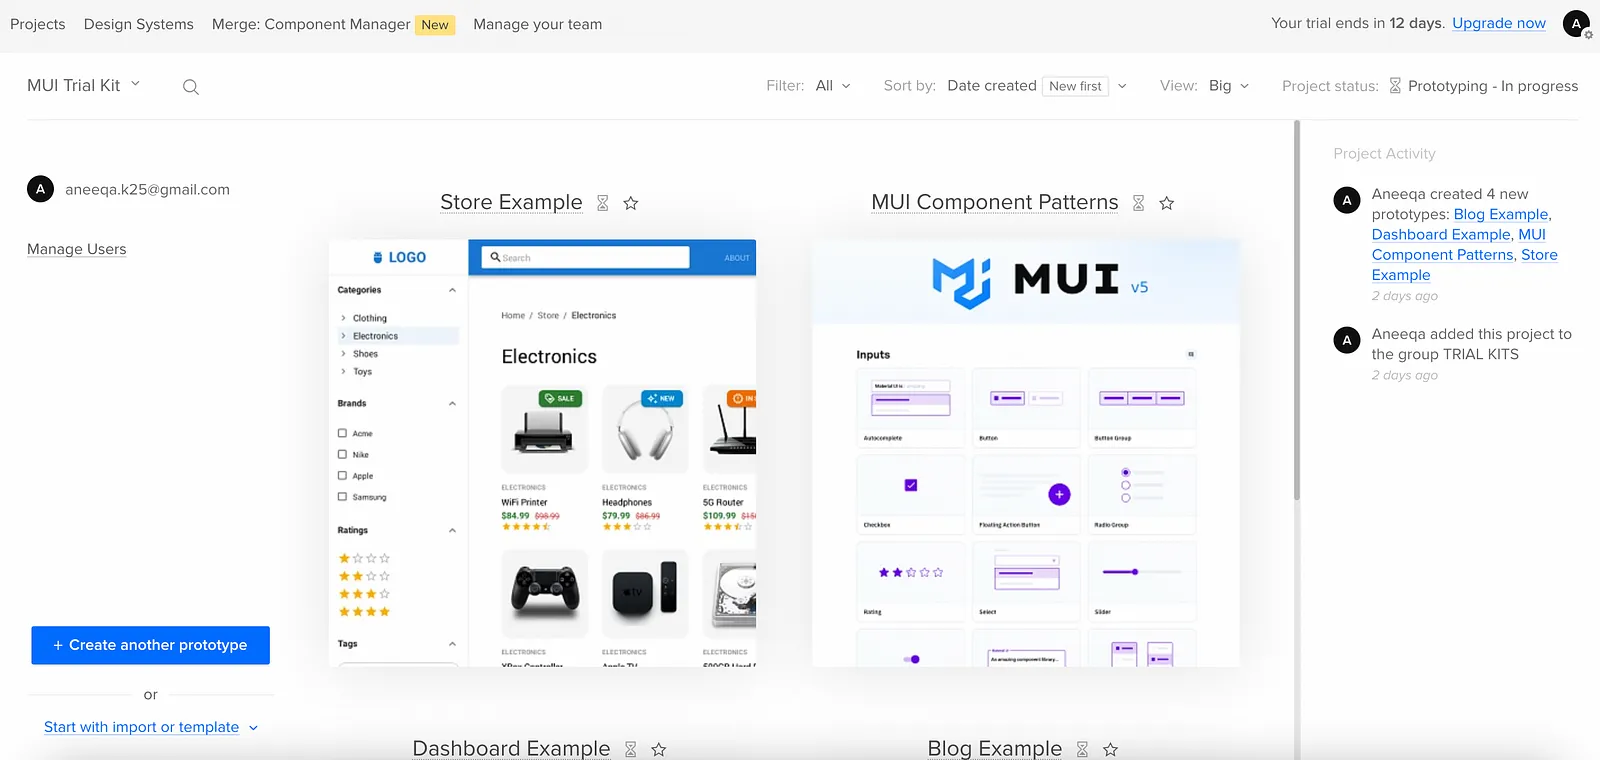
After your registration, it’ll take you to the dashboard screen which contains some trial kits with Ant Design, MUI and Bootstrap.
You’ve created the dashboard application in just 2 minutes.
Step 2: Prepare the app for deployment
We’ll do the following steps to prepare the app for the deployment process:
Optimise the code: Check for all the unnecessary code and dependencies and remove it. It’ll help you minimise the size of your application. For instance, by installing and activating the ESLint extension in your VS Code editor, you can receive warnings about unused code and unnecessary dependencies.
Update Dependencies: Make sure that all the dependencies are up-to-date. Run the following command in the terminal to update packages to the latest version.
It’ll create a build file in the build/static/js folder of your app.
Step 3: Choose a hosting service
Choosing the right hosting service for your React application is crucial for its performance, scalability, and security.
It all starts with identifying your needs and considering factors such as expected traffic volume, scalability needs, budget constraints, technical expertise, and specific features required for your app.
Some popular hosting options are AWS Amplify, Netlify, Vercel, Heroku, Firebase, and traditional web hosting providers like Bluehost and DigitalOcean.
But today I want to focus only on Vercel (formerly Zeit Now), which provides a free tier for hosting static and server-rendered applications, including React apps. It offers features like automatic deployments from Git, custom domains, SSL encryption, and serverless functions.
You can also view real-time performance metrics such as response time, latency, and error rates for your deployed applications from the Vercel dashboard.
Step 4: Deploy the React app
To deploy the app on Vercel, we first need to make our code available on GitHub.
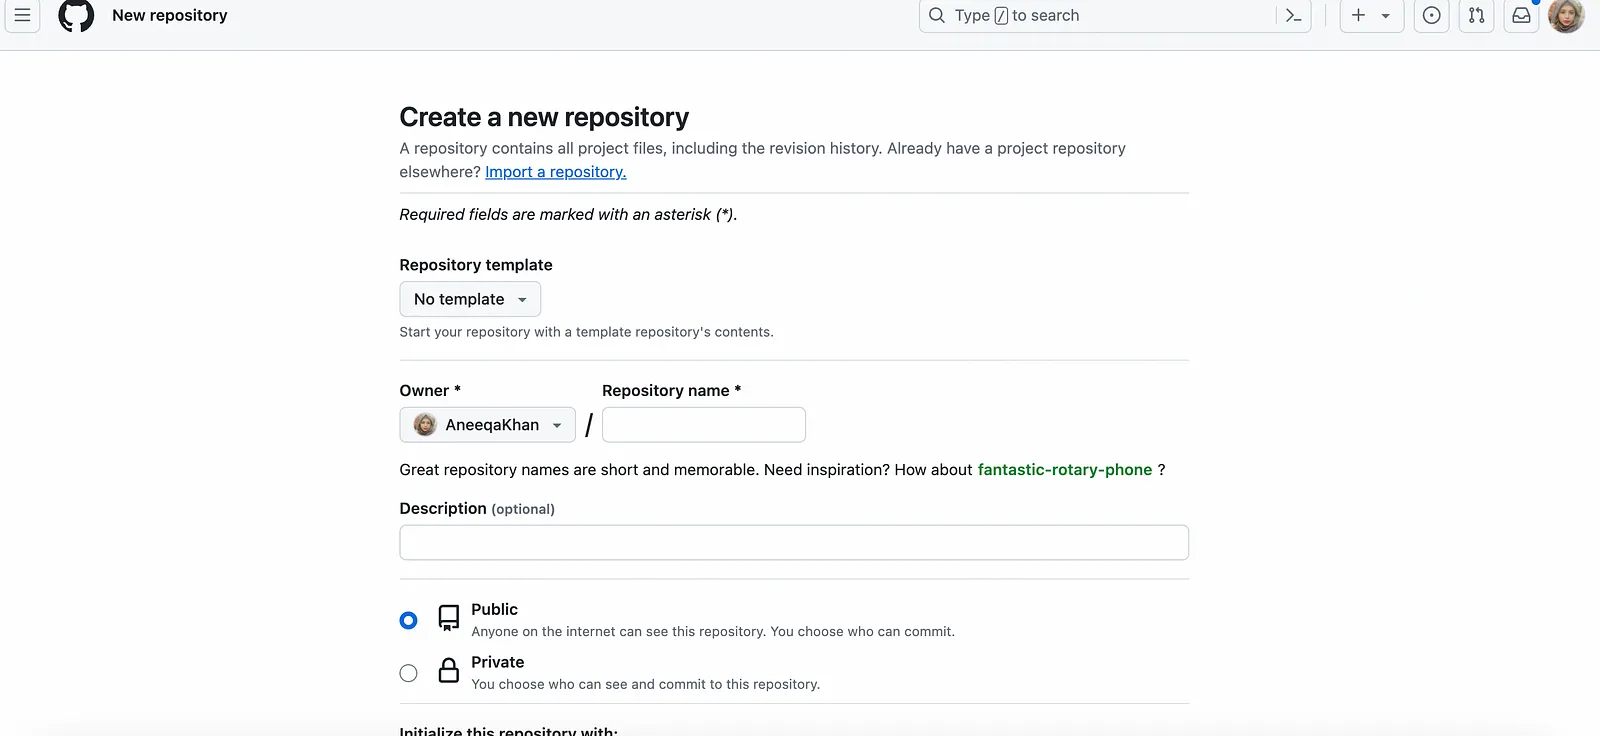
Simply create an account on GitHub and create a new repository. Type the name for your repo and make sure to make it public for deployment purposes.
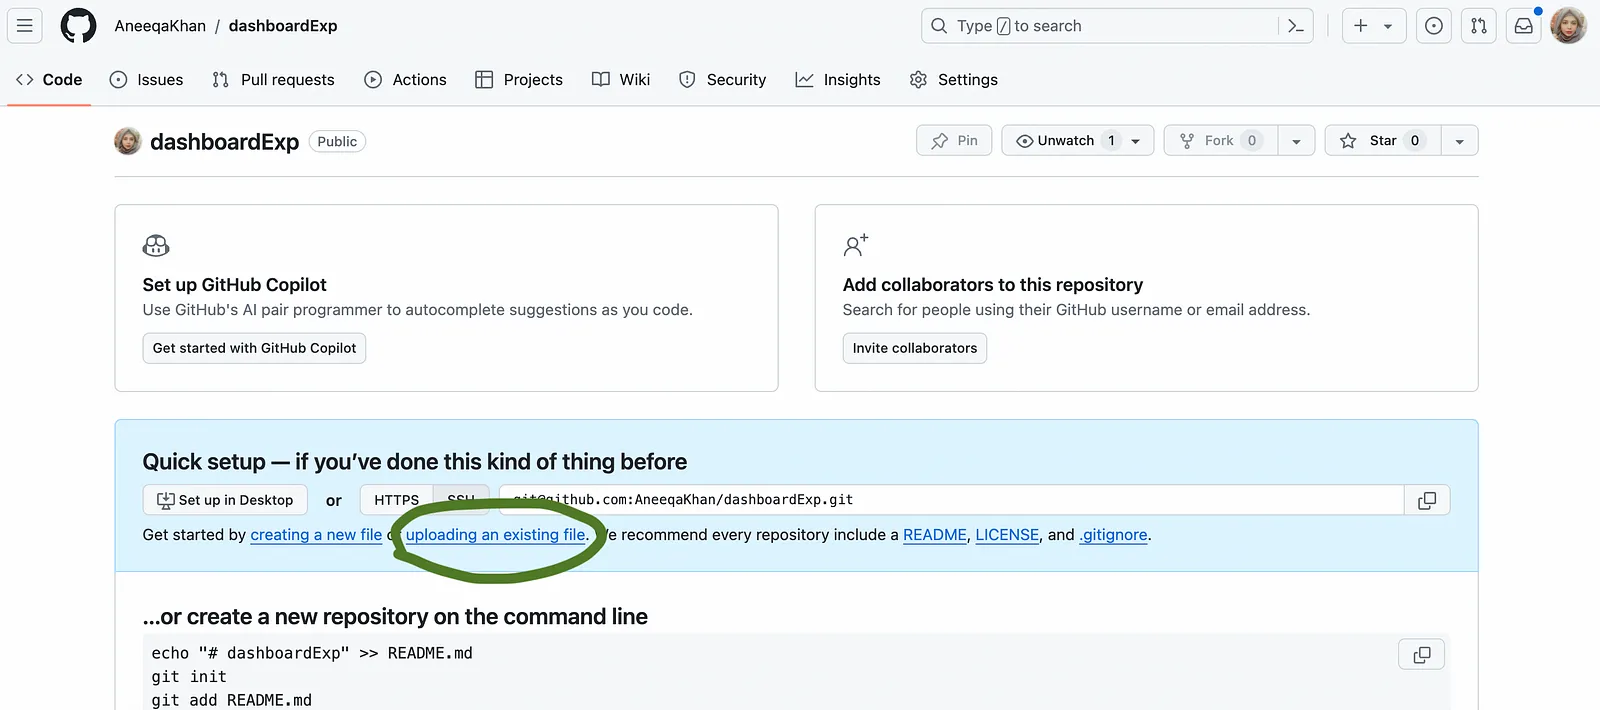
After creating the repo, it will take you to the repo creation screen. You can select to commit the files or you can directly upload it in the repo.
Make sure to commit/upload all folders and files except the “node_modules” folder.
Create a README.md file in the root directory to give the description of the project and instructions to run or build the application.
# Dashboard
React MUI dashboard web app created using UXPin Merge tool
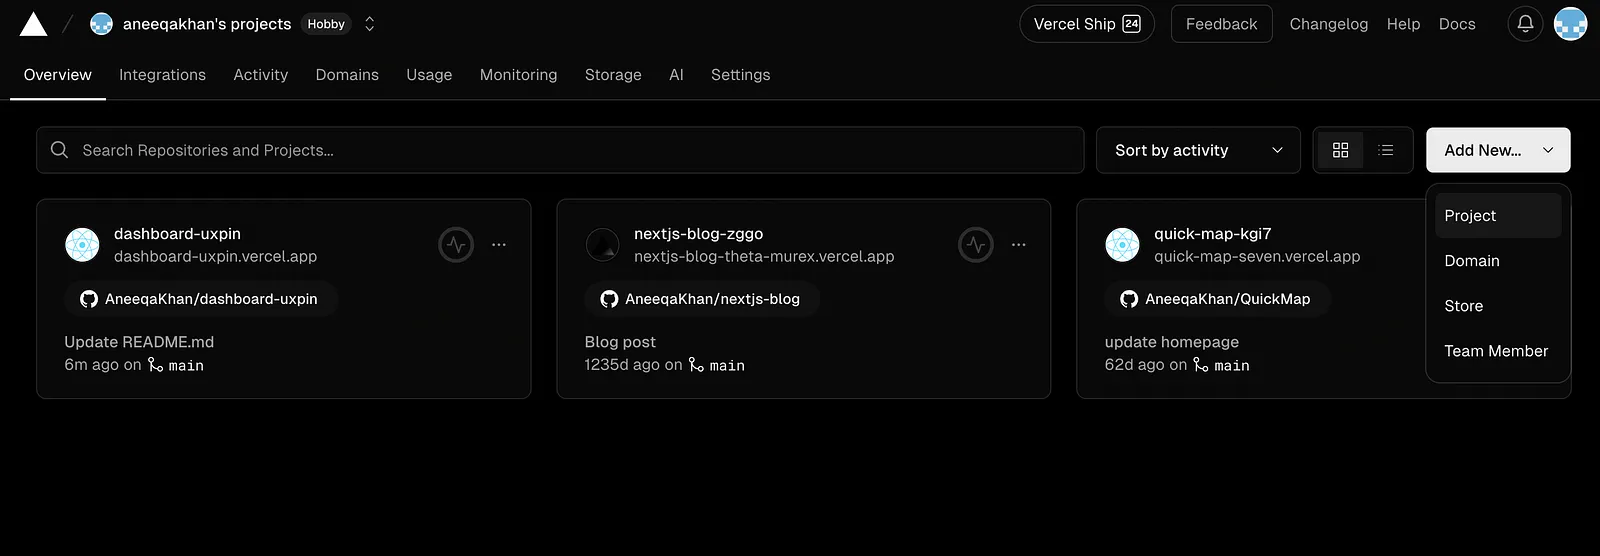
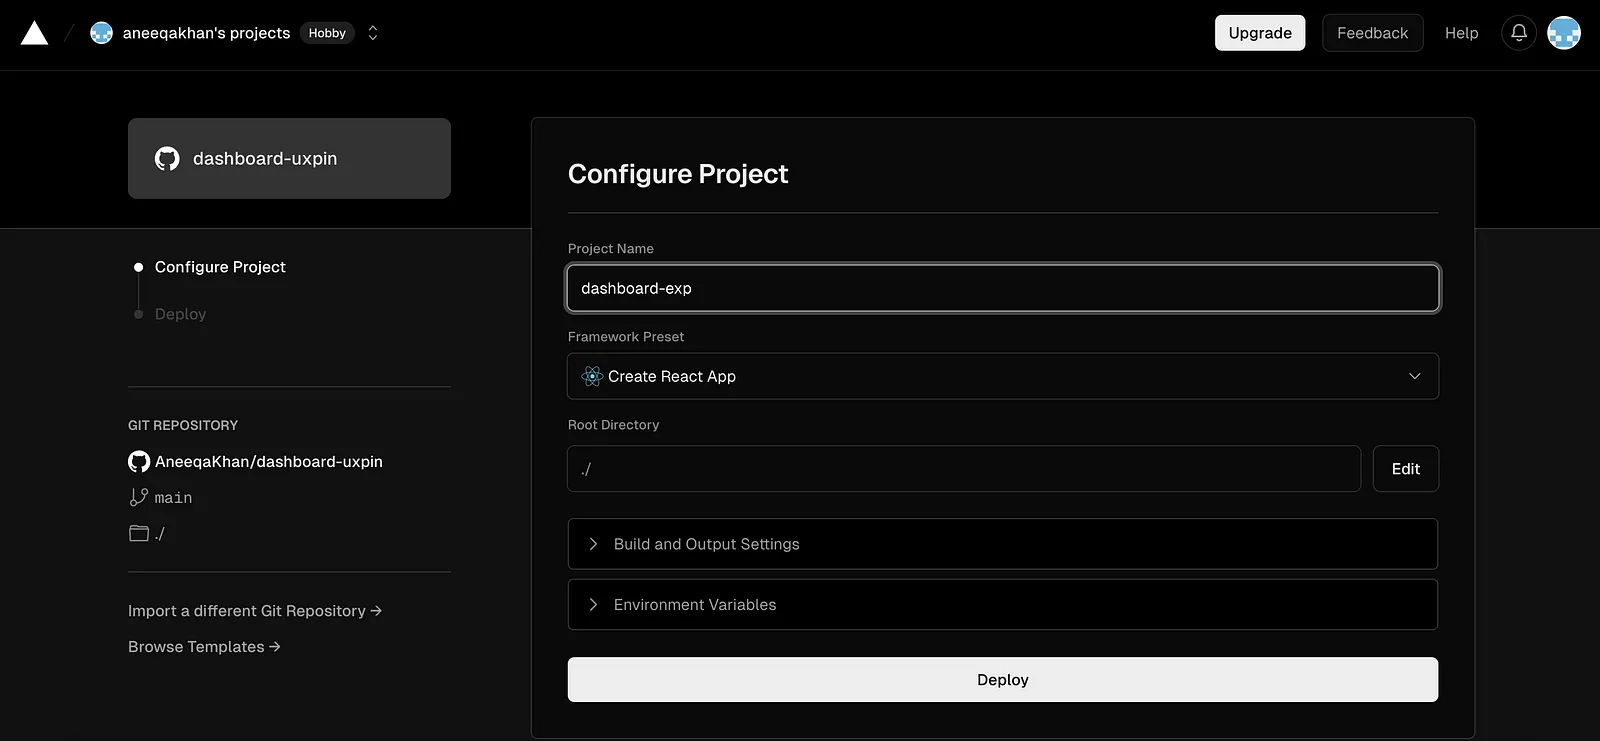
Now go to the Vercel website and log in with your GitHub account. It will take you to the Vercel dashboard.
Go to the Overview tab, click the “Add New” button from the right-hand side and select the “Project” from the dropdown.
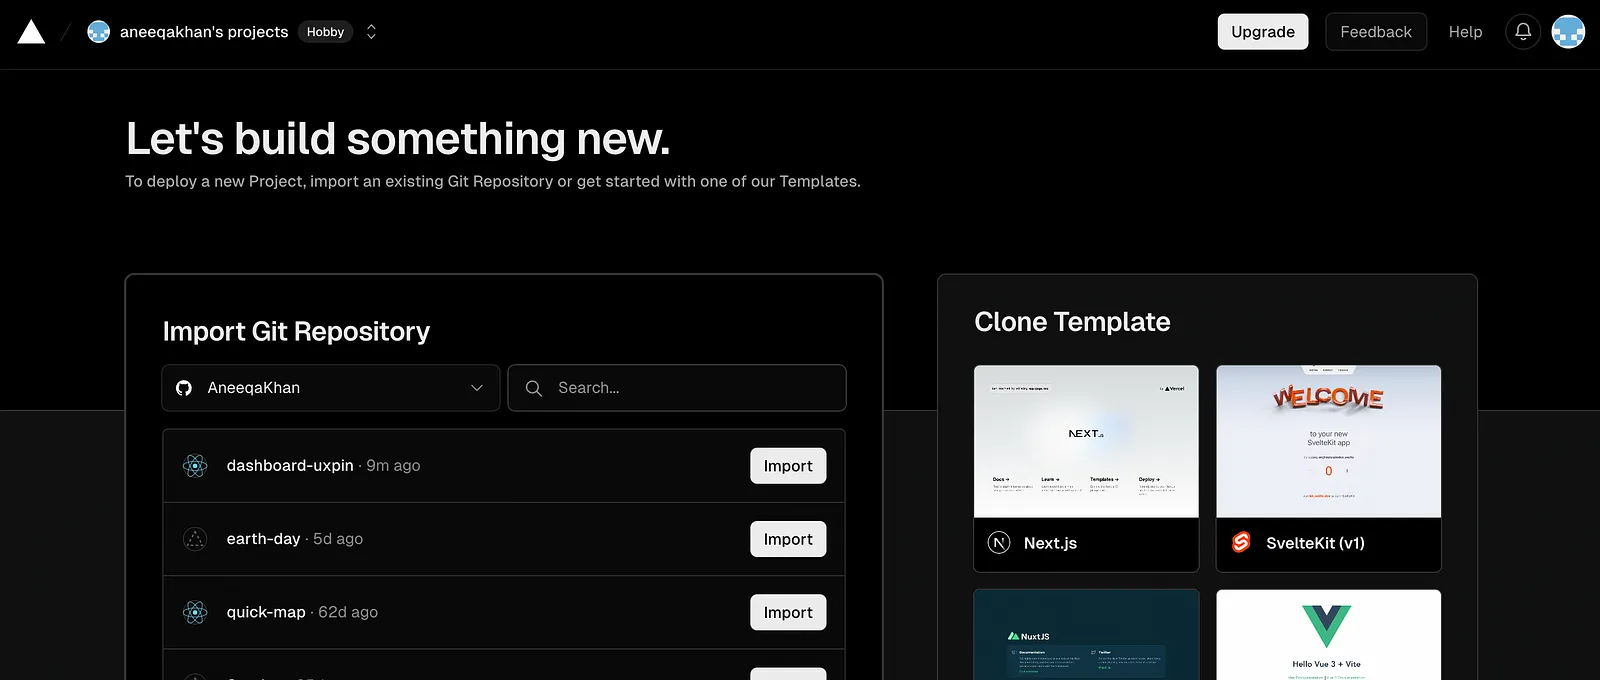
It will take you to another screen to select the repo from your GitHub account. I selected my dashboard repo and clicked import.
After import is done, click the “Deploy” button at the bottom of the screen to deploy your web app.
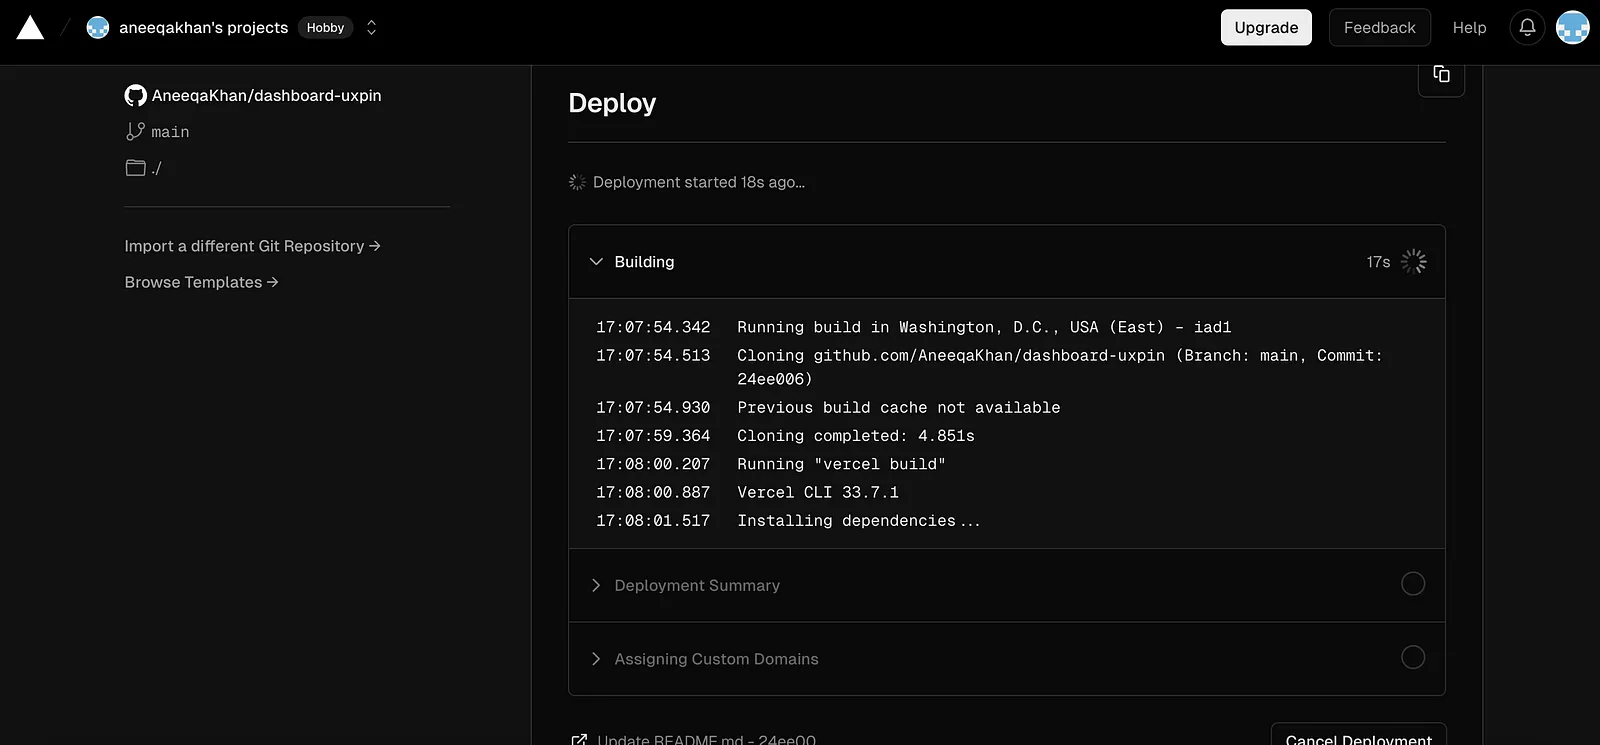
Vercel will start the deployment process.
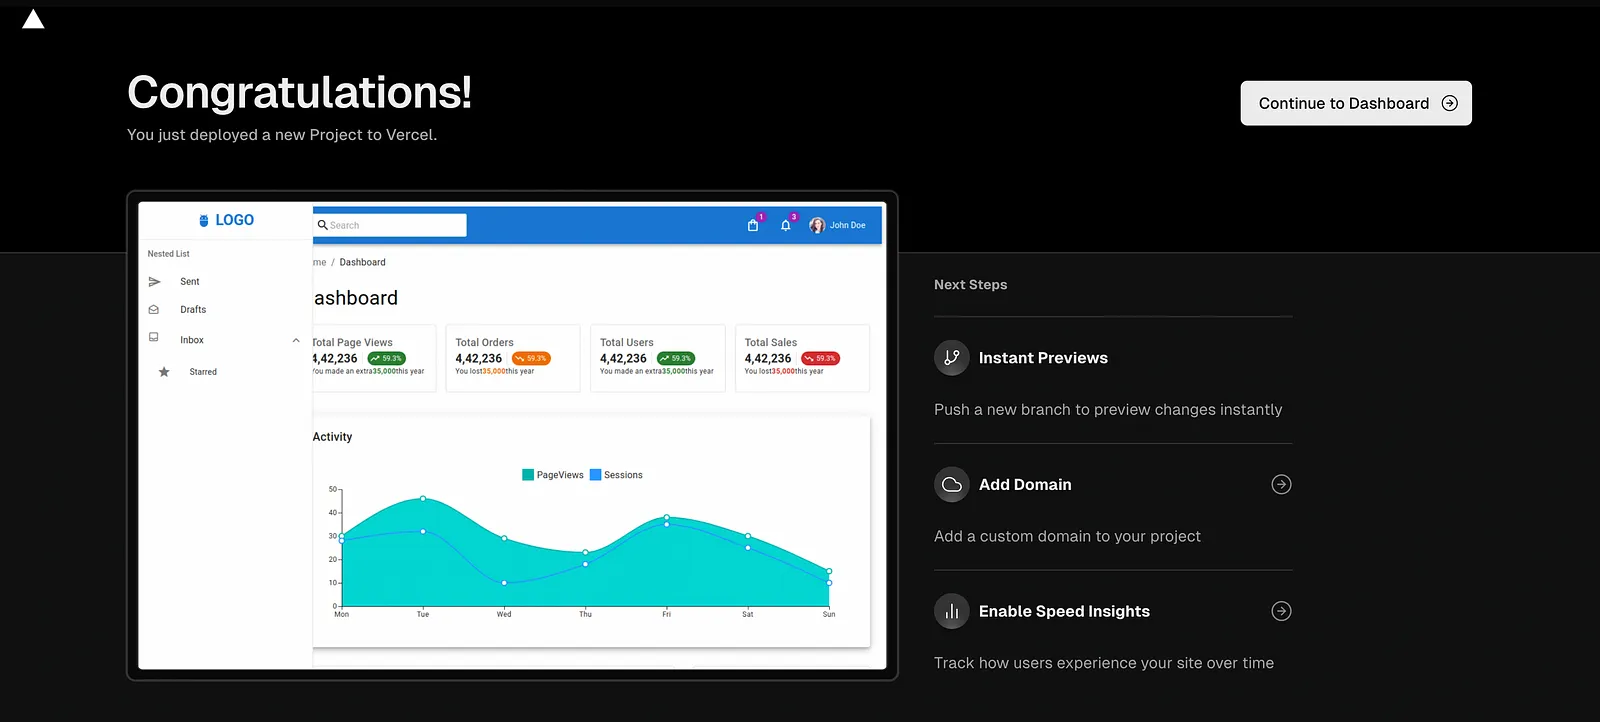
After the deployment is done (usually takes a few seconds), it will take you to another screen to display that the application is deployed. It also shows you the next steps you can take such as “Add Domain”, “Enable Speed Insights” etc.
Now click on the deployed app image from the above screen or go to the dashboard by clicking the “Continue to Dashboard” button from the top.
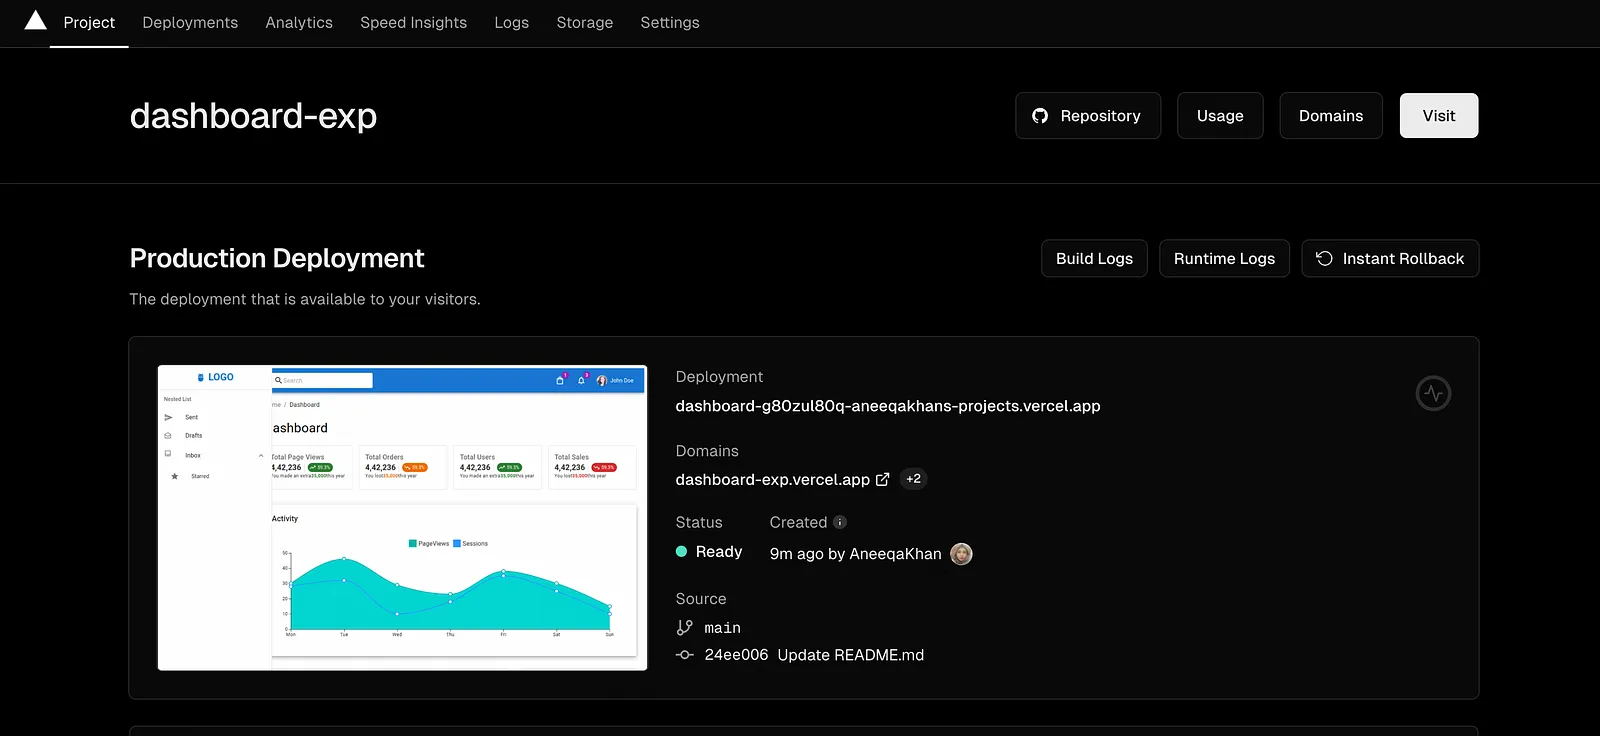
Here you can either click the “Visit” button or the link mentioned below the “Domains”. It will take you to the deployed web application.
Now you can add this deployed app link in your README.md file in GitHub.
Testing an app after deployment is crucial to ensure that it functions correctly and delivers a seamless user experience in the production environment.
Here is an example of using the browser developer tool by toggling the device toolbar.
Integration Testing: If your React app integrates with external services or APIs, perform integration testing to verify that data is being exchanged correctly and that integrations are functioning as expected. But our dashboard app doesn’t have any API integration yet so we do not need it.
Step 6: Monitor performance
Monitoring the performance of your web application is crucial to ensure its reliability and optimal user experience.
Here’s how you can monitor the performance of your web app in Vercel:
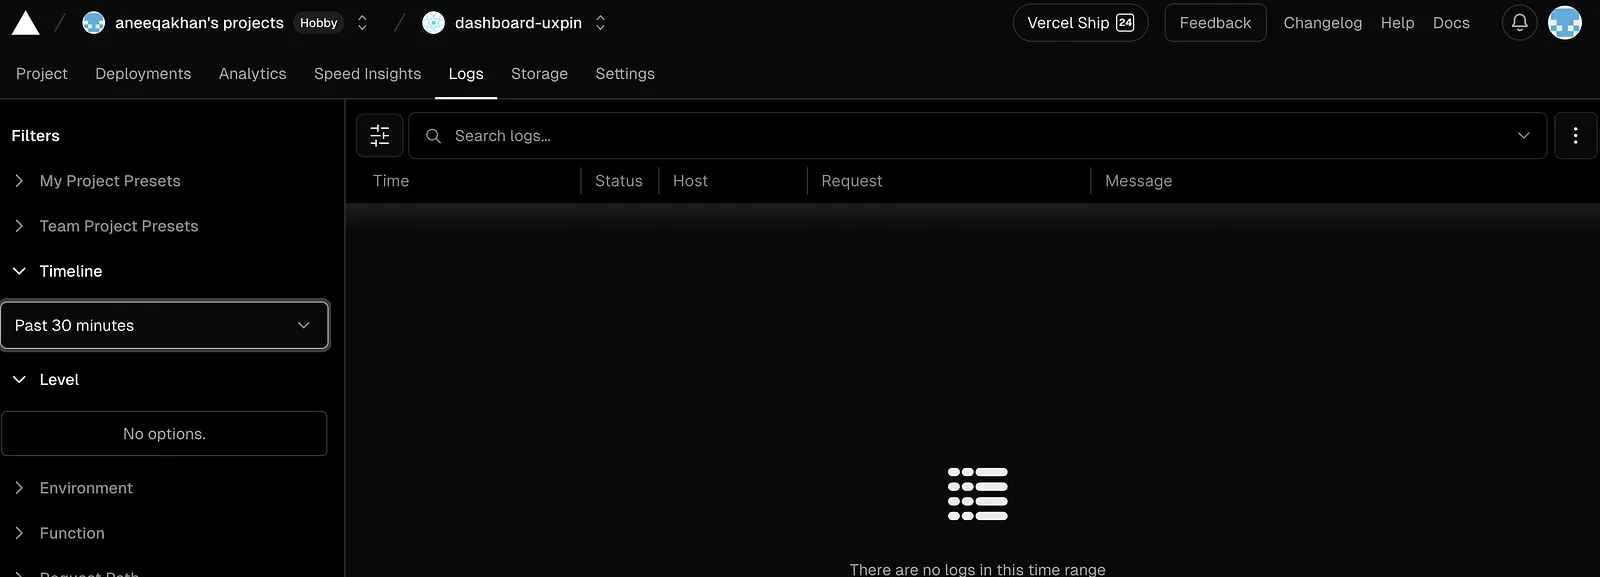
Deployment Logs
Check the deployment logs for your app in Vercel to monitor the deployment process and identify any issues or errors that may occur during deployment.
You can see it on the Vercel dashboard by selecting the “Logs” tab.
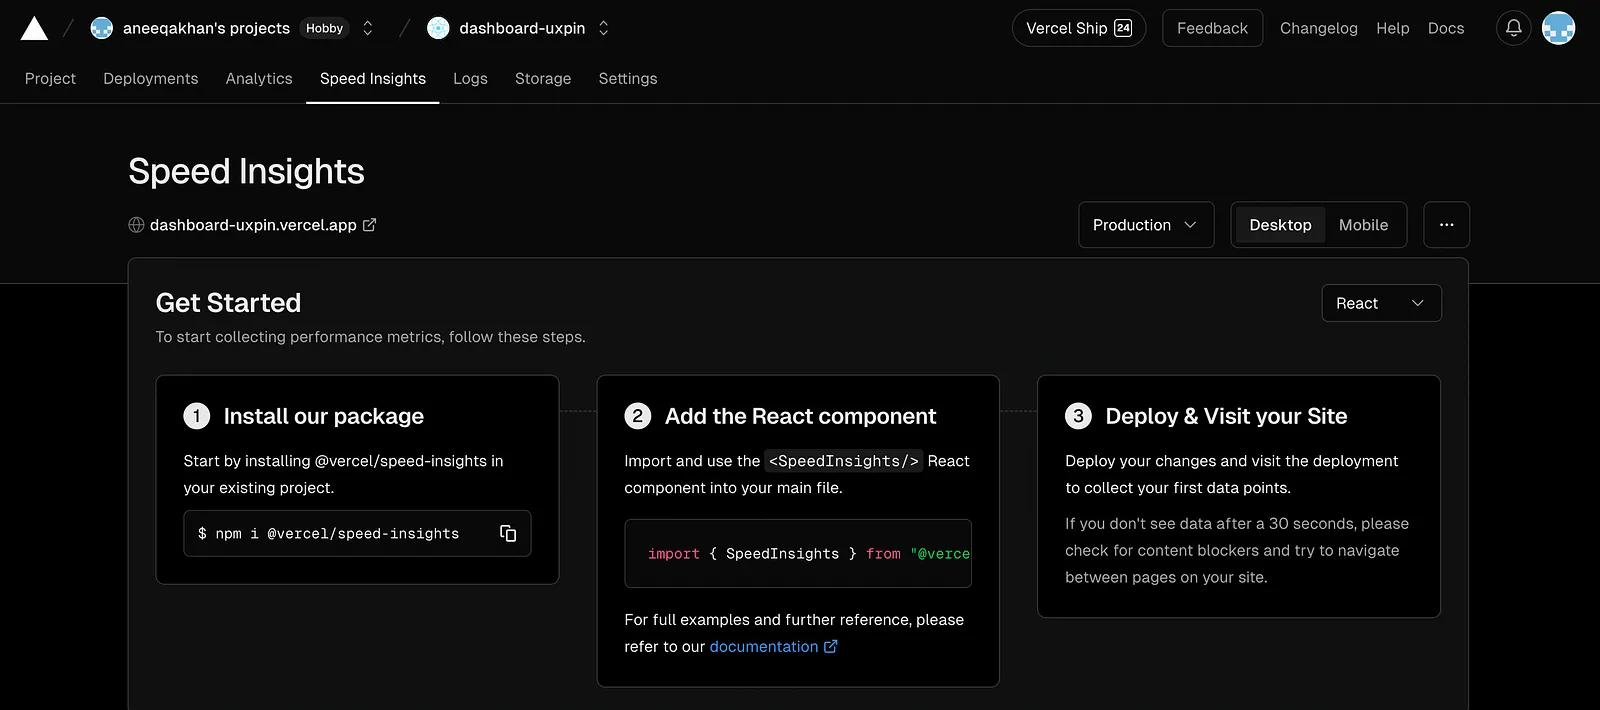
Enable Speed Insights
Vercel Speed Insights provides a detailed view of your website’s performance metrics, facilitating informed decisions for its optimization.
You can enable this feature by following these simple steps.
Go to the “Speed Insights” tab from the top toolbar in the Vercel dashboard.
import { Analytics } from '@vercel/analytics/react';
06
07
...
08
09
root.render(
10
11
<div>
12
13
<UXPinBox />
14
15
<SpeedInsights />
16
17
<Analytics />
18
19
</div>,
20
21
document.getElementById("root")
22
23
);
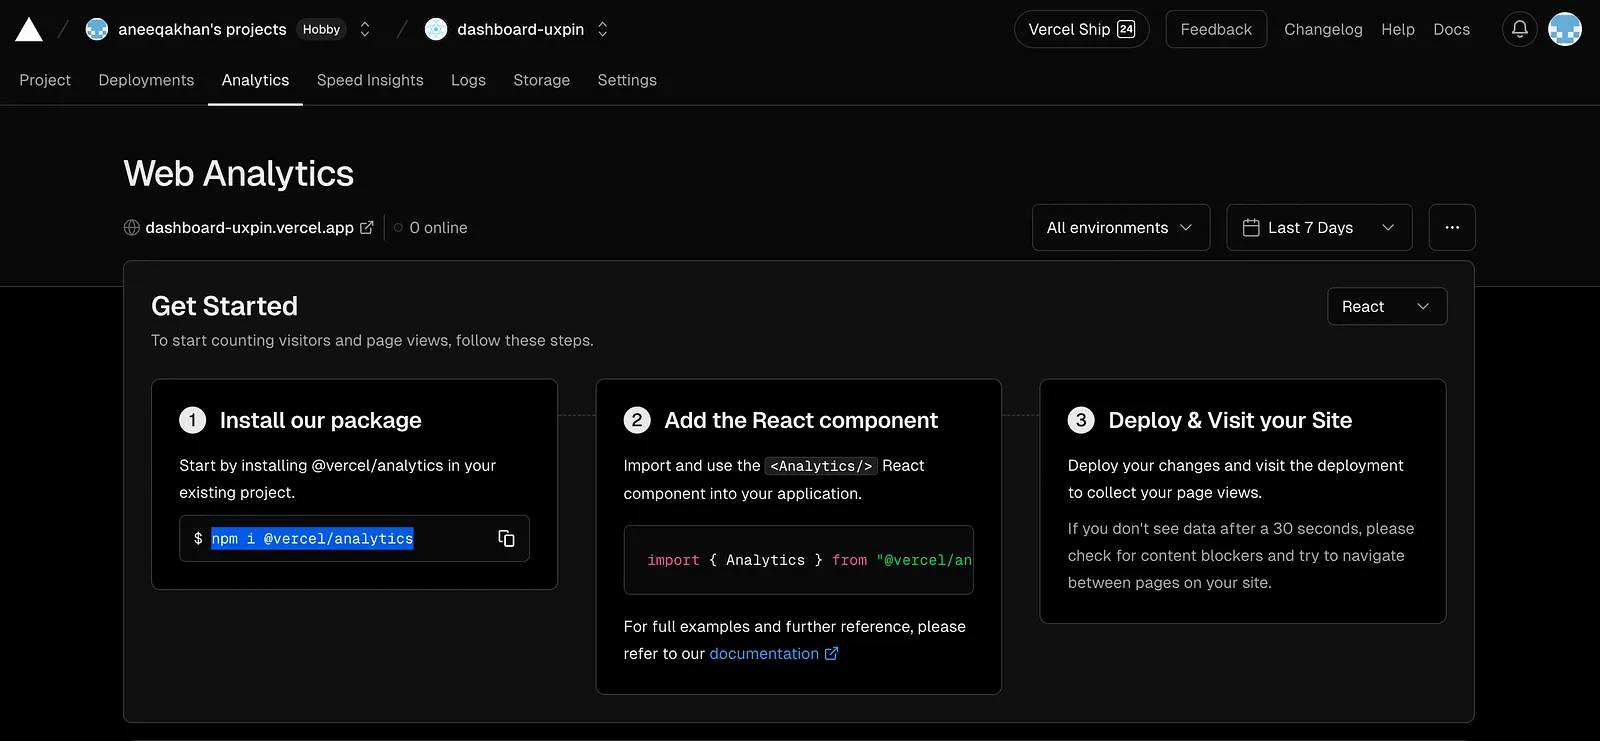
Deploy the application again and you can start seeing the analytics on the dashboard after some time.Learn more about Web Analytics from the Vercel Docs.
Step 7: Streamline future updates
Streamlining future updates in a Web app is essential for maintaining its relevance, fixing bugs, and adding new features efficiently.
Implement version control
Take advantage of version control systems like Git to manage changes to your React app’s codebase. By using branches, commits, and pull requests, you can track changes, collaborate with team members, and safely experiment with new features without risking the stability of your main codebase.
Set up CI/CD pipelines to automate the process of building, testing, and deploying your React app. CI/CD allows you to automatically run tests, verify code quality, and deploy updates to production environments with minimal manual intervention. This not only reduces the time and effort required for deployments but also ensures a consistent and reliable release process.
Implement feature flags
Introduce feature flags to control the release of new features in your React app. By toggling feature flags on and off, you can gradually roll out new features to specific user segments, gather feedback, and monitor performance before fully releasing them to all users. Feature flags also provide the flexibility to roll back changes quickly if any issues arise during deployment.
Invest in Automated Testing
Prioritize automated testing to ensure the stability and reliability of your React app. Write unit tests, integration tests, and end-to-end tests to verify the functionality of individual components and the app as a whole. Integrate testing frameworks like Jest and Cypress into your CI/CD pipeline to automatically run tests on every code change, catching bugs early in the development process.
Stay Up-to-Date with Dependencies
Regularly update dependencies, including React, React Router, and other third-party libraries used in your app. Stay informed about new releases, security patches, and deprecations to keep your app up-to-date and secure. Tools like npm audit can help identify and address security vulnerabilities in your dependencies, ensuring the reliability and integrity of your app.
Conclusion
In wrapping up, deploying a React app involves more than just putting it online; it’s about guaranteeing its functionality, speed, and adaptability as it grows. By adhering to the steps outlined in this guide, you can deploy your React app confidently and position yourself for success in the long haul.
Starting from the creation phase using tools like UXPin Merge and moving through the optimisation of code and updates of dependencies, each step is vital in the deployment process. Selecting an appropriate hosting service, such as Vercel, and conducting thorough testing across various browsers and devices will ensure a seamless experience for your users.
Furthermore, monitoring performance metrics and collecting user feedback will help you pinpoint areas for enhancement and guide your decisions for future updates.
In essence, deploying a React app isn’t a one-and-done deal; it’s an ongoing journey of refinement and creativity. By embracing these best practices and maintaining a proactive stance, you can ensure that your React app continues to meet the evolving needs of your users and remains a valuable asset for your endeavours.
Build React app in minutes. Streamline design and front-end development workflows by using code-first design tool. With UXPin Merge AI product, you can create React app interfaces without having to learn React. Try UXPin Merge for free.
Use a single source of truth for design and development.
Discover Merge
by Aneeqa Khan on 20th August, 2024
Software Engineer and enthusiast of learning and developing applications that adds value to the organization and environment as well. Experienced in developing applications in ReactJS and mobile applications in React Native.
Still hungry for the design?
UXPin is a product design platform used by the best designers on the planet. Let your team easily
design, collaborate, and present from low-fidelity wireframes to fully-interactive prototypes.
We use cookies to improve performance and enhance your experience. By using our website you agree to our use of cookies in accordance with our cookie policy.